I am relatively new to astrophotography. I have found it very challenging, turning the nearly invisible smudges my camera captures during my imaging sessions into full color photos. A typical astronomical object will look like the following image before it has been processed.

M1 “Crab Nebula” RAW
Weak Signal
As you can see, it doesn’t look anything like the beautiful images one is used to seeing. This occurs because signal is very weak. Therefore most of the pixel data are congregated into the lower part of the photos histogram.
The object in the image can be made visible by a process called “stretching”. Stretching can be done in Photoshop, but astrophotographers typically use software designed to specifically process astronomical images. There are many special purpose astrophotography programs available. Some are free, others are nominally priced while the more sophisticated programs are priced similar to Photoshop.
After trying some of the free and low priced programs with mixed results I decided to download a trial version of the very popular PixInsight program. PixInsight is like the Swiss Army Knife of Astronomical processing software. It has hundreds of special functions, each designed for a specific processing task.
Trying out PixInsight
After I downloaded the PixInsight trial version, I watched a number of video tutorials trying to learn the basics of the software. While the online videos were very good at explaining the use of specific tools in the PixInsight toolbox, none of them did a good job of showing the basic steps needed to process an image. After watching several videos, I still did not have a clear understanding of how to use the program. However, I should point out that now that I have learned the basics of PixInsight, the videos have been very helpful in improving my skills.
An Excellent Book on PixInsight
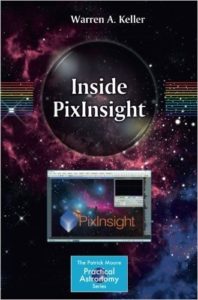
Warren Keller’s Book on PixInsight
Just as I was about to give up on PixInsight, Warren Keller (no relation) brought out an outstanding book on PixInsight. Warren’s book turned out to be just what I needed to learn the basics of PixInsight. The first six chapters of his book walk the reader through the essential steps needed to process an astronomical image. After the completing those steps I was able to produce presentable images. The rest of the book walks the reader through many of the advanced features of the program. These advanced topics can be used to make your images really pop (assuming you have enough good data).
I won’t attempt to explain each of the steps that I used to process the “data” I collected on M1. However, I only used the techniques taught in the first 6 chapters of the book. I am still experimenting with some of the more advanced features found later in the book.
Astrophotographers refer to the group of images (sub-exposures) they collect on a specific astronomical object as data rather than photos. I think the reason they use this terminology is that until all of the sub-exposures are combined and processed they really don’t resemble a normal photograph.
My Processed M1 Image
For M1, I collected twenty 3 minute sub-exposures; one hour of total exposure time. Most of the premier astrophotographers will collect 6 to 30 hours of data on a given target. Therefore, I didn’t expect my image to be as awe inspiring as the images of these highly skilled amateurs.
You can check out the work of some of the worlds best astrophotographers on NASA’s Astronomical Photo of the Day site.

M1 Crab Nebula
Here is my finished photo. It is a significant improvement over photos I have processed by simpler means. I highly recommend PixInsight software along with Warren Keller’s excellent book “Inside PixInsight”. His book gave me the set of training wheels I needed to get started with this incredible program.
Fred