Using Auto Focus During Astrophotography

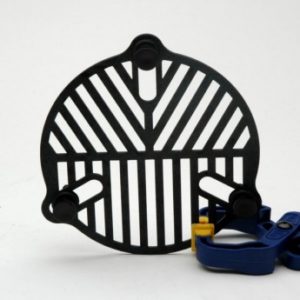
Bahtinov Mask

Bahtinov Mask


Auto focus software can significantly improve image focus; especially when images are captured over several hours during an imaging session.  One of the biggest challenges of Astrophotography is making sure images are in focus.

Manual Focus Method

Most astrophotographers do their initial focus using a Bahtinov mask to perform the initial focus.  The Bahtimov mask causes a de-fraction pattern to appear in the image of the stars.

The Bahtinov mask is placed over the front of the telescope while the telescope is pointed at a bright star.  Short exposure images are then taken to assess the accuracy of the focus.

The following images show the defraction patterns for a star that is out of focus and the same star in focus.
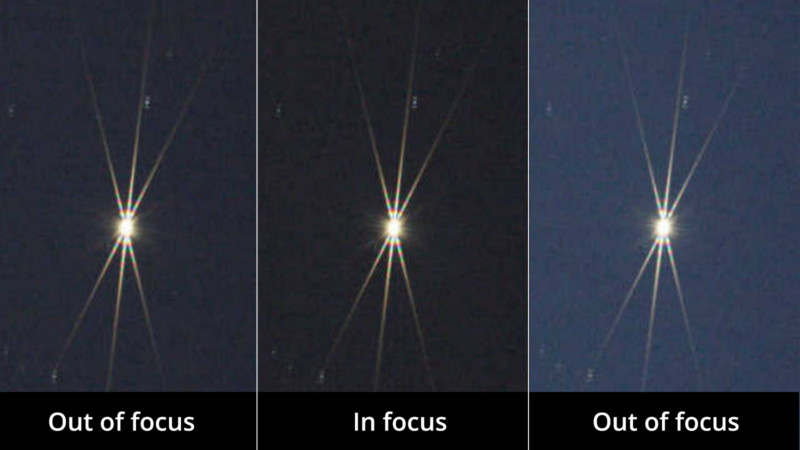
The difference is subtle.  If you carefully examine the images you will notice that in the left image the vertical diffraction line passes to the right of the center of the X formed by the other two lines.  In the right image it passes to the left of the center of the X.  If you examine the center image you can see that it passes directly through the middle of the X.  A Bahtinov mask is considered the Gold standard for establishing focus when doing astrophotography.  Without the mask is is very difficult to tell if an image is at the best focus point.

Why Auto Focus?

Unfortunately, the correct focus point changes throughout the night because of the changing outdoor temperature.  The only way to keep the images in focus is redo the focus several times throughout the night.  This can be very time consuming because it usually requires moving the scope away from your target, pointing it to a bright star for focusing and then moving the scope back to the object you are imaging.  Therefore a lot of time can be saved by using auto focus software.

Implementing Auto Focus

In order to use auto focus software the telescope focuser has to be controllable by your computer.  Therefore the telescope need to have a software controllable motorized focuser.  There are many ways to add this capability to a telescope.  One way is to add a motor drive to your existing telescope focuser.  Several manufactures sell kits to motorize various types of manual focusers.  Another Approach is to replace the existing focuser with a new motorized focuser.

My Auto Focus Setup

Moonlight Motorized Focuser

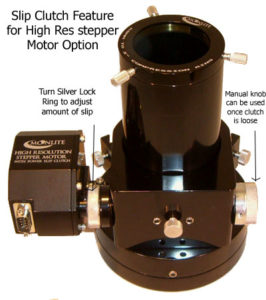
My telescope uses a Moonlight focuser like the one shown here.  It has a precision stepper motor which enables the software to adjust the position of the focuser in extremely fine increments during the autofocus process.

I use a program called Sequence Generator Pro to collect my astro images. It can be used to fully automate a night of astrophotography, which can include multiple targets.  One of the tools it includes is an autofocus routine.

In order to use the autofocus routine, the telescope must be fairly close to focus before the autofocus routine is run.  This may seem counter-intuitive, but the primary purpose of the autofocus routine is to keep the telescope in focus throughout the night.  It is not designed to focus an unfocused telescope.

How Auto Focus Works

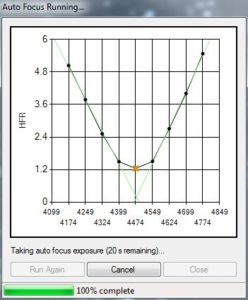
The autofocus process requires some initial setup before it will work with a specific telescope and focuser.  The user must specify the number of steps the stepper motor will move for each move for each focus adjustment.  The user also specifies the number of points that they would like included in the focus curve (typically 9).  The routine will then move the focuser out 5x the specified step change to collect the first point.  It will then take a short exposure with the focuser at this position and make a calculation to determine the accuracy of the focus.  The value calculated is called the Half-Flux-Radius, HFR.  The larger the value of HFR the poorer the focus.  The software will then move the focuser in by the specified step size, take another image and calculate the value of HFR.  This process continues until the number of specified points have been collected.

Plot of HFR Focus Curve

After the data has been analyzed two reqression lines are are plotted forming what is called a “V” curve.  The point where these two lines intersect is the best focus point.  The software will then move the focuser to this position and take another exposure to verify its result.  If the calculated HFR is less than or equal to the lowest value of HFR measured during the autofocus run the focuser will be left at this position and the software will begin collecting images.  If the value is greater than the minimum measured the routine will either repeat or utilize its sophisticated algorithms to select the best focus point. This can happen occasionally occur when the sky transparency is less than ideal.

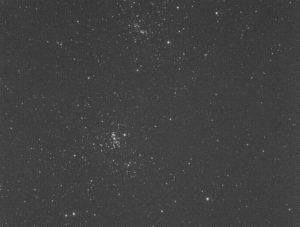
The autofocus curve shown is from a recent imaging session of NGC 869 (Double Cluster).

The following image is the confirmation image from the Auto Focus routine.  Click on the image to see the full size image.

NGC 869 Raw Image (Click for full size image)


Print Friendly, PDF & Email

First Astrophoto Processed with PixInsight

I am relatively new to astrophotography.  I have found it very challenging,  turning the nearly invisible smudges my camera captures during my imaging sessions into full color photos.  A typical astronomical object will look like the following image before it has been processed.

M1 “Crab Nebula” RAW

Weak Signal

As you can see, it doesn’t look anything like the beautiful images one is used to seeing. This occurs because signal is very weak.  Therefore most of the pixel data are congregated into the lower part of the photos histogram.

The object in the image can be made visible by a process called “stretching”.  Stretching can be done in Photoshop, but astrophotographers typically use software designed to specifically process astronomical images.  There are many special purpose astrophotography programs available.  Some are free, others are nominally priced while the more sophisticated programs are  priced similar to Photoshop.

After trying some of the free and low priced programs with mixed results I decided to download a trial version of the very popular PixInsight program.  PixInsight is like the Swiss Army Knife of Astronomical processing software.  It has hundreds of special functions, each designed for a specific processing task.

Trying out PixInsight

After I downloaded the PixInsight trial  version,  I watched a number of video tutorials trying to learn the basics of the software.  While the online videos were very good at explaining the use of specific tools in the PixInsight toolbox, none of them did a good job of showing the basic steps needed to process an image. After watching several videos, I still did not have a clear understanding of how to use the program.  However, I should point out that now that I have learned the basics of PixInsight, the videos have been very helpful in improving my skills.
An Excellent Book on PixInsight

Warren Keller’s Book on PixInsight

Just as I was about to give up on PixInsight, Warren Keller (no relation) brought out an outstanding book on PixInsight.  Warren’s book turned out to be just what I needed to learn the basics of PixInsight.    The first six chapters of his book walk the reader through the essential steps needed to process an astronomical image.  After the completing those steps I was able to produce  presentable images.  The rest of the book walks the reader through many of the advanced features of the program.  These advanced topics can be used to make your images really pop (assuming you have enough good data).
I won’t attempt to explain each of the steps that I used to process the “data” I collected on M1.  However, I only used the techniques taught in the first 6 chapters of the book.  I am still experimenting with some of the more advanced features found later in the book.

Astrophotographers refer to the group of images (sub-exposures) they collect on a specific astronomical object as data rather than photos.  I think the reason they use this terminology is that until all of the sub-exposures are combined and processed they really don’t resemble a  normal photograph.

My Processed M1 Image

For M1, I collected twenty 3 minute sub-exposures;   one hour of total exposure time. Most of the premier astrophotographers will collect 6 to 30 hours of data on a given target.  Therefore, I didn’t expect my image to be as awe inspiring as the images of these highly skilled amateurs.
You can check out the work of some of the worlds best astrophotographers on NASA’s Astronomical Photo of the Day site.

M1 Crab Nebula

Here is my finished photo. It is a significant improvement over photos I have processed by simpler means.  I highly recommend PixInsight software along with Warren Keller’s excellent book “Inside PixInsight”.  His book gave me the set of training wheels I needed to get started with this incredible program.

Fred


Print Friendly, PDF & Email

Construction of Our New Roll-off-Roof Observatory

The next step in the construction of our Roll-off-Roof was the construction of the building.  We chose a design from Back Yard Observatories, BYO.

Scott Horstman contacted me a few days prior to the planned start date, to let me know that a local building supply house would be making a delivery the following day.  Here is a photo of the large pile of material that was delivered.

Building Materials Arrive

Building Materials Arrive


With the help of the delivery crew, I was able to identify and count all of the different items before I signed off on the delivery.  This was harder than I thought it would be because there were many types of materials with names that were new to me.  I know things like 2×4, 2×8 etc, but names like OSB and five quarter were new to me.

When Scott and his crew arrived the next day, they inventoried all of the materials before starting construction.   Next, they measured the size and squareness of the concrete pad. Apparently, he has run into pads which were several inches from square.  Scott quipped that it is still possible to build a square building on a trapezoidal foundation, but not ideal!  Our foundation was square to within 1/8″ thanks to our excellent concrete contractor.

Checking the Pad

Sorting Material and Checking the Pad

Once the pad had been checked, they began framing the walls.  They were able to use the observatory’s concrete floor to assemble the walls.  Since I already had power to the observatory pad, they were able to install a temporary outlet to run their saws and compressors.  It was amazing for me was to not see Scott or any of his crew refer to a single drawing during the construction.  He and his expert crew build so many of these observatories (although they are all different sizes) they automatically know the dimensions for every part!

Assembling One of the Walls

Assembling One of the Walls

Once each wall was completed it was leveled and anchored in place.

IMG_1228

First Wall Up, 3 to Go


IMG_1233

Here you can see that three walls have been completed.  In the above photo you can see that the south wall is shorter.  The gap in the top of the wall will be filled once the hinged drop- down south wall has been installed.  Also, you can see the beefed up header on the right (West) wall.  The additional header is needed to support the weight of the roll-off-roof.  Below is photo looking from the South.

IMG_1232

South Wall Showing Cutout for Drop Down Section


Once all four walls were in place, the framing for the roll-off-roof support structure was added. In addition, they are starting to frame the deck we had them add under the roll-off-roof supports.  The deck turned out to be a very nice addition to the observatory.  It makes a very nice place to sit and relax when we are waiting for it to get dark prior to a summer observing session.

Construction of Deck and Roll-off_Roof Supports

Construction of Deck and Roll-off_Roof Supports

With the framing for the deck completed it was time to start adding the decking.
We chose treated five-quarter decking, but in retrospect I would have probably gone with the more costly composite material to reduce future maintenance.

Deck Framing Complete

Deck Framing Complete

All of the decking was nailed down it was cut to length in a single cut.  That is a pretty neat trick to make sure that all of the boards are exactly flush at the visible end of the deck.  The other thing I realized is that doing it this way saves considerable time that would be required to measure and individually cut each board.   Being the weekend hacker that I am, I don’t think I would have thought to do it this way.

Deck Planking

Deck Planking

Once the walls and roll-off-roof support structure were completed, fabrication of the two rolling beams that support the roof trusses were assembled.  There are four heavy duty steel “V” rollers used on each beam.  The beam is also strengthened with a treated 2 x 8.  The 2 x 8 also covers the gap between the top of the wall and the bottom of the roof.

Construction of Roof Rollers

Construction of Roof Rollers

The following photo shows the roof support beams sitting on the angle iron rail which supports the roof and guides the rollers.

Roof Roller Installed on Rail

Roof Support and Rollers Installed on Wall and Roof Rail

Finally the roof was completed and ready to be rolled back if the rain would stop!  We were lucky we were only getting sprinkles instead of a “hoosier” downpour, which would have stopped the work.  Once the roof was on, the roof and walls were covered with felt paper before the metal roofing and cedar siding were installed.

Roof Completed

Roof Completed

In this photo the cedar siding has been installed and the metal roof is being completed.

Metal Roofing and Cedar Siding Being Installed

Metal Roofing and Cedar Siding Being Installed

The final photo shows what the observatory looks like with the roof rolled back!  Our friends and family are always amazed when they seen the roof rolled back for the first time.

Observatory with Roof Rolled Back

Observatory with Roof Rolled Back

In the next installment, I’ll move inside the observatory to show some of the interior details.

Print Friendly, PDF & Email

Observatory Build (Electrical and Data Connection)

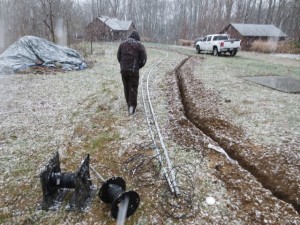
After the concrete pad was completed the next step was to trench electrical, data and security cables to the observatory pad.   Since the observatory is over 200 feet from the house trenching for the cables was a significant job.  This was a bigger job than I wanted to tackle with a walk behind trencher.  Therefore I hired an excellent electrical contractor to run the power and data connections to the observatory.

The finished Trench for Power and Data

The finished Trench


The day started out pretty nice.  The weather forecast was predicting dropping temperatures with the possibility of light snow flurries.  Our contractor got an early start, so we did not expect the weather to be a problem.

He used a Bobcat with a trenching attachment to dig the trench.  The entire trench was completed in less than an hour.  As you can see by his attire, the temperatures were not real cold when he completed the trench.  Unfortunately, that was going to change!


Preparing the Conduit Just as the Snow Starts to Fall

Preparing the Conduit and Pulling Wires


By the time he started assembling the conduit, the we were starting to get light snow flurries.

The next step was pulling the cables.  The snow flurries were getting progressively heavier as they were pulling the wires.

Before they were done the weather turned into near blizzard conditions. Note they are now wearing  heavy coats and gloves. I stepped inside the house after this photo, to warm up.  Of course, they kept on working!

More Snow (What a Mess!)

Where did this Blizzard come from?

By far the hardest part was pulling the three heavy gage wires through the power conduit.   This is where the skill of the electrician versus the weekend warrior (home DIY) is apparent.  Even with the atrocious weather,  they were able to get the wire pulled and the conduit into the trench in a little less than two hours.  The biggest problem they had was maintaining  their footing in the slippery slope near the house.

Once all the wires and conduits was in the ground everyone was chilled to the bone.  So much for trusting the weather forecast.

Some final comments on this part of the project.

  1. Install large power and data conduits.
    The electrician that everything be installed in conduits; even though it was not required by our local code.  He would have had to bury the wires deeper had he not used conduit.  Also, he inserted a pull string in each conduit, in case we would ever need to add an additional circuit or data cable someday.  This is very cheap insurance.
  2. Install larger circuits than you think you need.
    I asked for two 15A circuits.  I felt this was enough capacity to satisfy my requirements.  However, he suggested two 30A circuits and an additional wire to give me 230V circuit if needed.  The difference in cost was only about $300.  In retrospect, I realize that two 15A circuits would have been marginal since one them was already dedicated to the Roll-off-Roof system.  That would have left a single 15A circuit to power everything else in the observatory.  With the 60A capacity I have, I don’t have to worry about future growth.
  3. Utilize an experienced, licensed electrician.
    Their experience and skills will save you money and problems in the long run.  My electrician saved me a lot of frustration and kept me from making several costly mistakes.  I also ended up with a much better installation than I could have done myself.

Fred


Print Friendly, PDF & Email

Building an Observatory (First Steps)

Indiana weather does not offer an abundance of clear nights for observing or astrophotography.  However, last winter we had a lot of clear nights, but the time to setup and teardown my astrophotography setup kept my wife and I from taking advantage of most of them. We found it really hard to get motivated to setup and teardown our gear with snow on the ground and frigid temperatures.

As our frustration grew, we decided we should build a “simple” observatory.  Our initial plan was to construct a small concrete pad with a permanent pier; which could be covered with a small garden shed which could be rolled over the pier to protect the telescope and mount.  Of course, as our planning progressed, the scale of our  “simple” observatory began to expand! After nearly 9 months of planning we decided to build a medium sized roll-off-roof observatory.

We settled on a 15′ x 15′ Roll-off-Roof design with two piers and an area to setup a third telescope inside the observatory.  One of the piers will be dedicated to astrophotography and the other will be used for visual astronomy.  The advantage of an observatory is that anytime there are clear night skies it is easy to open the observatory and begin observing; eliminating most of the long setup time.  The elimination of 3 hours of setup and teardown will substantially increase our motivation to take advantage of the clear and cold winter skies.

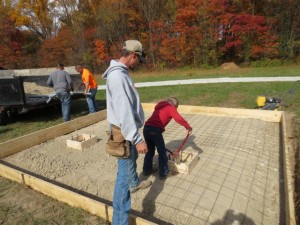
Framing of Observatory Pad

Framing of Observatory Pad


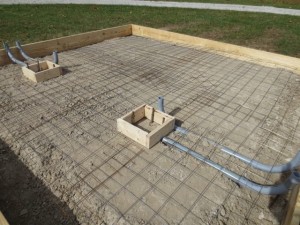
Construction started in early November. The pad forms were constructed the day before the concrete pour.  The pad included two cutouts where the piers will be installed.


Completed Forms Showing Pier Locations and Power and Data Conduits

Completed Forms Showing Pier Locations and Power and Data Conduits


Conduit was added to handle the electrical and data cables that will be needed at each pier.


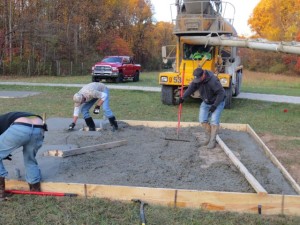
More Concrete and Lots of Hard Work

The Concrete Pour Ballet


On the following day It was time to pour the concrete.  After watching this expert crew work I was relieved that I hadn’t tried to do this myself.  Watching their choreographed ballet I was impressed with their skill and organization. Things were happening so fast that there was no time to stop and decide who was to do each job or discuss how something was to be done.


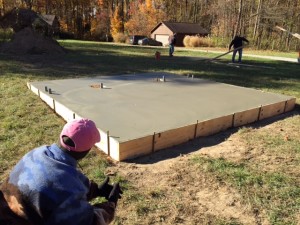
Completed Observatory Foundation

Completed Observatory Foundation


Here is a photo of my wife admiring the completed pad.

Check back in soon to see the observatory construction begin.

Fred

Print Friendly, PDF & Email

First Attempt at Astrophotography

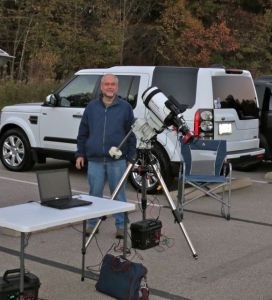
Astrophotography Setup

Astrophotography Setup

Intermixed with my ham radio activities this summer I have started to dabble in Astrophotography.    A camera is similar to a very sensitive receiver.  It is able to give very nice views of faint stellar objects that are often barely visible through the telescope’s eyepiece.

This photo was taken at Burkhart Creek County Park, in Morgan County Indiana.  This park is a nice dark site for central Indiana.  It is located about 35 mile Southwest of Indianapolis.

On this particular night the temperature dropped rapidly and dew began to cover everything soon after sunset.  The black strap on the front of the telescope is a dew heater which keeps the dew from condensing on the telescopes optics.

M27_BurkhartCreek

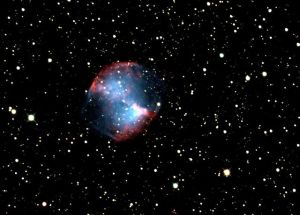
Dumbbell Nebula Messier 27

As a newcomer to astrophotography, I have learned something new during each outing.  On this particular outing I discovered that my setup was not well balanced; thus overloading the Declination drive motor.  I made some temporary adjustments and was at least able to take the following image of the Dumbbell Nebula (Messier 27).


Once I got home, I corrected the balance issue.  Now if we can just get some clear skies, I will try some more astrophotography.

73,

Fred, KC9QQ

Print Friendly, PDF & Email

Some Springtime Observing

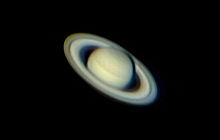
Saturn

Saturn

On Tuesday night the skies were clear so my wife and I got with some others from the Indiana Astronomical Society to do some observing.  I took our Meade LX80 mount and 6 inch Astro Tech refractor to give it a run.  During the winter I added a StarGPS to the LX80 to make the setup a bit easier.  I highly recommend the StarGPS system.  It eliminates many of the potential errors that can lead to poor scope alignment.  If the scope is carefully leveled and set to its home position, the GPS will enable you to get a near perfect alignment every time.

After I assembled  and leveled the LX80 I installed the Astro Tech scope and turned on the power.  In about 2 minutes the StarGPS found our location.  It loaded the correct time and location into the handset and then put the hand controller into the “Easy” align mode.  I did a two star alignment and was pleased to see a “Alignment Successful” message on the hand controller.

The first thing I did was slew to Jupiter to catch it before it dropped below the trees.  I was rewarded with a nice view of Jupiter and four moons. Jupiter’s bands were visible but the Great Red Spot was not visible.

My wife and I spent the rest of the night viewing a number of deep space objects.  One of the nicest DSOs we saw was when my wife got M81 and M82 in the eyepiece at the same time.  We also had a nice view the Sombrero Galaxy (M104).  Later in the evening I tried out Meade’s “What’s Up Tonight” feature to take  a guided tour of the nights best objects.  The hand-controller selected a few objects that were new to me;  so it was time well spent.

We finished up the evening by getting our first view of Saturn this year.  I always enjoy looking at Saturn because it has such a striking appearance.

Fred,  KC9QQ

Print Friendly, PDF & Email

Warmer Weather and Clear Skies

LinkScope

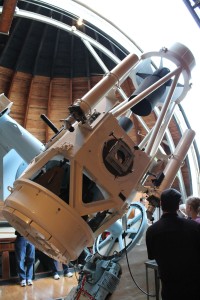
Goethe Link Observatory 36 Inch modified Cassegrain Telescope

Tonight we took advantage of the clear skies and new moon by opening the 36″ Goethe Link telescope.  The weather this winter in Central Indiana has provided very few opportunities for amateur astronomers.   Normally cold weather would not prevent us from using the Link Observatory or our own telescopes.  However, observing this winter has been very difficult because of frequent snow storms and weeks of overcast conditions which have only allowed us to get out and observe one night this winter.

My wife and I are just starting to dip our toes into astrophotography.  Like ham radio, astrophotography is a hobby that offers endless opportunities to spend money! We are trying to start slowly without sinking a fortune in specialized equipment.  A friend loaned us a small planetary camera to try out before we purchase our own.

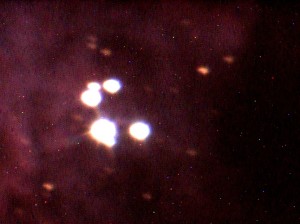
M42 Orion Nebula

M42 Orion Nebula

We decided to try it out on the Link 36 inch scope last night.  Our first photo clearly shows our lack of experience.  However, it was really exciting to see our first crude image materialize on the laptop’s screen. The photo on the left is of M42, the Orion Nebula.  It shows the Trapezium (stars which form a trapezoid) and the large Nebula (gas and dust around the Trapezium).  The Orion Nebula is visible with binoculars but you won’t see any color with binoculars because our night adjusted eyes cannot see the color.  However a CCD camera can capture the color.  I’m hoping our astrophotography skills will improve with more practice.

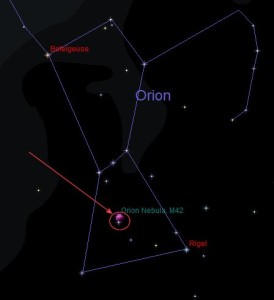
Locating Orion Nebula, M42

Locating Orion Nebula, M42


If you would like to look at the Orion Nebula in your binoculars here is a chart that will help you locate it.


73,

Fred, KC9QQ


Print Friendly, PDF & Email

Cube Sats Launch

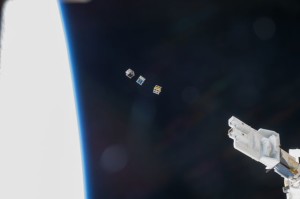
Cube Sats being Launched from ISS

Cube Sats being Launched from ISS

I don’t know how many of you saw this photo on the today’s Astronomy Photo of the day, so I am showing it hear in case you missed it.  The cube-sats are near and dear to we hams since they often carry Ham Radio beacons or repeaters.

This photo shows three cube-sats being released from the International Space Station last November.

73,

Fred, KC9QQ

Print Friendly, PDF & Email

Has the USA Lost its Spirit of Adventure ?

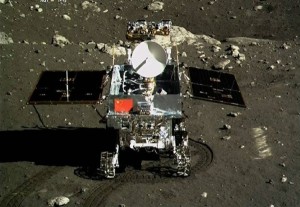
Chinese Rover on Moons Surface

Chinese Rover Yutu on Moons Surface

China has greatly advanced their space program by soft-landing a spacecraft and rover on the moon.  This is a significant step towards placing men on the moon for the first time since the USA abandoned its Apollo moon exploration program in the 1970’s the result of financial pressures created by the Vietnam war and the War-on-Poverty.

I don’t know about you,  but I find the news of a Chinese moon landing to be bittersweet.  I am pleased that the Chinese are inspired to develop the technology to put men on the moon, but I’m am disappointed that we (the US) have placed our space exploration aspirations on the back burner and now find ourselves in the position of having to pay Russia to transport our astronauts to the International Space Station with a replacement for the Space Shuttle still years away.

During the 1960s, the  America’s space program was my inspiration to study engineering.   From the the 8th grade on, I knew I wanted to be an engineer.  I graduated from high school in 1966 and started my engineering studies at Purdue University that fall.  While I was studying Mechanical Engineering at Purdue several of my professors had worked on various aspects of the Gemini and Apollo programs.  Some of our homework assignments even dealt with design aspects of the Apollo program.

Unfortunately, by the time I received my mechanical engineering in 1970 the US was drastically scaling back spending on space exploration.  Therefore,  I didn’t get a chance to work on the space program when I graduated.  By the time NASA received the funding to move forward with the Space Shuttle and International Space Station I was already well entrenched in my career at Carrier Corporation (a Division of United Technologies).

I know I was not the only engineering or science student at Purdue that had been inspired by the US space program.  The same thing that inspired me and tens of thousands of others to pursue degrees in science and engineering is now happening in China.  Hundreds of thousands of Chinese school children will one day graduate with engineering or science degrees because they were galvanized by seeing their Lunar Rover, Yutu, exploring the surface of the moon.

What is our country doing to inspire the next generation of scientists and engineer?  I fear we are not doing enough.  Have we lost our ability to dream?  Are we doing an injustice to our children and grand children by not having a realistic strategic plan for space exploration?  It seems that NASA funding  moves up and down with the whims of the politically elite in Washington.  They seem more focused on spending tax dollars to buy votes than they are on maintaining our technological leadership.  A couple of bright spots in our current space program are the Hubble space telescope and the Mars Science Laboratory, Curiosity, both which were planned over a decade ago, but I don’t believe we are doing enough now to capture the imaginations of our young people.

We need to find some way to get our kids and grand kids away from their video games, text messaging, cell phones and the non-redeeming entertainment from Hollywood and motivate them to dream, explore and design new things.  

shanghai-chinaPerhaps a legitimate NASA space program could help to capture the imaginations of the next generation of US scientists and engineers.  Otherwise, I fear that in the near future we will just become the consumers of technology generated by China, India and other developing countries which understand that their future depends on motivating their young people to pursue technical degrees which ultimately benefit their entire population.  All one has to do is visit China to see the significant impact this approach has been having on their country over the last two decades.

Just my thoughts,

Fred, KC9QQ

Print Friendly, PDF & Email