My First Tower (Part 3)

While I was waiting for the woods to be cleared I started the process of preparing my application for a building permit.  The first step was obtain a copy of the county zoning regulations.  I was able to download the latest zoning regulations from County Zoning Boards website.

The next step was to read the regulation cover to cover (several times) paying particular attention to any language dealing with towers and tall structures.  The information for towers and tall structures was spread out through the entire document.  After highlighting the appropriate sections I started gathering the information that would be needed for the building permit.  This is where Fred Hopengarten’s book, Antenna Zoning for the Radio Amateur, was very helpful.  His book contains a CD that has sample applications and a number of other useful documents and references.

Many of the requirements in the Zoning Regulations were designed to address cellular phone towers.  Unfortunately, the regulation did not specifically address amateur radio structures and the language which addressed cell phone towers did not exclude amateur radio towers.  The sections on towers included a number of requirements I would be unable to comply with.  I therefore called the zoning department and spoke with a very helpful lady that my tower would be considered as a farm “structure” rather than a tower.  She pointed out that since I live an area which is zoned rural, the requirements for my tower were not covered by the section on radio towers but in the section on farm structures (silos etc.).  As long as my tower was under 100′ in height and I met the setback requirements, I would not need present my application at a zoning board meeting; which was a huge relief.  All I had to do was drop off the regulation at the zoning department along with a check!

The final application included:

  1. A description of the tower along with the various codes that the tower complied with.  I also included an engineering drawing of the tower.
  2. Drawing showing property line and road setback distances
  3. Technical drawing of the tower base (downloaded from the Trylon website)
  4. I also included a copy of my RF exposure analysis even though it was not a requirement for the permit but had to be done to comply with the FCC requirements.  I found an website where I could load in my information on power, distances and antenna gains and perform the calculations.
  5. I also included a Photoshop created image of what the tower would look like from the street.  Fred explained how to do this in his book.
Photoshop Created Image Showing How the Tower Would Appear when Installed

Photoshop Created Image Showing How the Tower Would Appear when Installed


It is amazing how close the final installation looks like the initial Photoshop created drawing.  You may need to click on the photo to see the tower hidden in the trees just to the left of the house.  The actual tower looks nearly identical to this Photoshop mockup when viewed from the same location.

Once I submitted my permit and paid my application fee I had a building permit in my hands within a week.  I feel fortunate compared to many hams that find it nearly impossible to obtain the critical building permit or need to go through months or years of back and forth with their zoning boards.

At the same time I was preparing the building permit application, I contacted Don Daso, K4ZA, to see if he would be available to install my tower.  He said he would be available, but it would be a several months before he could actually start the work.  He suggested that he perform a site survey during one of his upcoming trips to work with another client.  Prior to the site survey I sent Don my preliminary specifications (tower height, antenna selections etc).  During the site survey Don suggested several changes to my preliminary list.  Most were aimed at improving the reliability of components on the tower (rotor, antenna selections, hardline versus coax, lightening protections and antenna selections.

At this point Don and I began to pass an Excel spreadsheet back and forth through email so that he could continue to review and approve as I made the suggested changes.  The Excel spreadsheet was also used to keep track who would provide the various components that would be needed (me or Don).  I also used this spreadsheet to track the order and delivery of all the stuff after the orders were placed, and to keep track of the project costs.
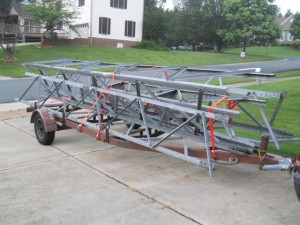
TowerPhotoOnTrailerDon also contacted me and told me he had found a nearly new takedown tower that was identical to the one I had planned to purchase.  I contacted the owner of the tower and we agreed on a price.  Don then  picked up the tower and  dropped at my place on his way to another client. Don saved me a bundle on the tower.  The Trylon Super Titan was like new and I got it for about 40% the cost of a new tower.

In the next installment I’ll briefly describe the hardware on the tower and the start of the construction process.

73,

Fred

My First Tower (Part 2)

After I had made the decision to put up a tower I realized I didn’t know where to start.  After doing some initial research on the internet I found a few sites where other hams chronicled their own tower installations.  Most of those sites focused on the actual installation of the tower and did not cover any of the preliminary steps such as:

  1. Site selection
  2. Building permit preparation and approval
  3. tower and antenna selection
  4. RF Exposure analysis
  5. Selection of all of the other components needed to make the system work (rotor, rotor control, coax, rotor cable, switching and lightning protection and grounding).

I then purchased three books that I found very helpful.  They were Up the Tower, by Steve Morris, Antenna Towers for Radio Amateurs by Don Daso and Antenna Zoning for the Radio Amateur by Fred Hopengarten.  After reading each of these books cover to cover I quickly realized that a lot of planning and preparation would be needed to insure a reliable, long lasting and well performing tower installation.

My next step was to contact W9RE, a local ham I knew had significant experience installing and maintaining towers.  W9RE, Mike,  is a legend in the ham radio world for his world class performance in contests.  His station also has a world class antenna farm!

Mike visited my house and helped me scope out a couple of potential locations for the tower.  Mike pointed out that a number of trees would have to be removed to make room for the tower and beams.  It also appeared that additional trees might have to be removed to make the space needed to actually erect the tower. Mike also, suggested the names of a couple of hams that might be willing to do a turnkey installation.

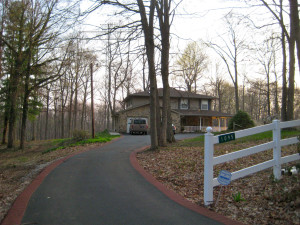
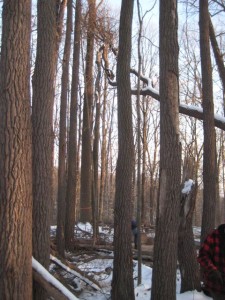
TreesBefore

Woods Behind House

I thought my dreams of a tower were about to come to and end since my wife was not pleased at the prospect of having to remove a lot of trees to make room for a tower.   Fortunately, another event occurred that made the issue of the trees a moot point.   Our septic system failed.  After a visit by the local health inspector it was determined that we would have to install a new septic field.  Because of the new stringent regulations governing septic systems in our county we were told we would have to clear nearly an acre of woods behind our house to make room for the new septic field!  I would not be allowed to install my tower in the septic field, but the removal of nearly 100 trees would open up a lot of space that could be used to erect the tower.


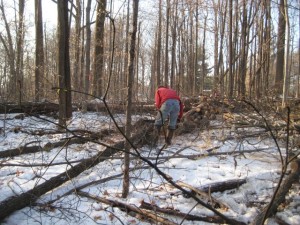
TreeRemoval

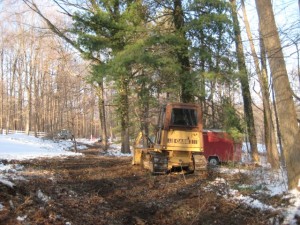
Tree Removal Begins

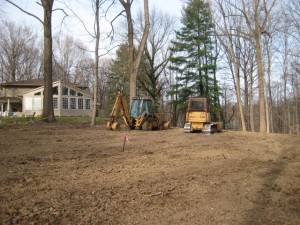
The process of clearing the field for the new septic field started in December 2010.  However, because of the weather and other factors the tree removal took nearly four months.  The building code required that the trees and a large portion of the roots had to be removed.  Her are a few more photos showing that process.  There were chains saws, a bulldozer and backhoe busy for weeks clearing the field to make room for the new septic system. Several tri-axles full of wood had to be hauled away.

After

After Trees Removed

NewRoad

New Driveway


The next issue we ran into was that we had to build a second driveway to provide access to the new septic field otherwise we would have to wait until August for the ground to get solid enough to bring in the tanks, gravel and other items needed for the septic system.


The photo to the right shows the new driveway before it was layered with 15 loads of crushed stone.

In the end, the new driveway was very useful during the tower installation.  It enabled easy access by the concrete trucks and ultimately by the 120′ crane that was used to erect the tower and antennas.

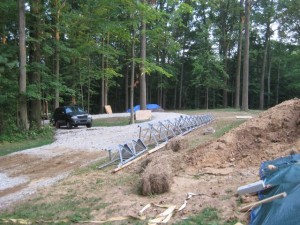
Portion of the New Driveway and the unassembled Tower

Portion of the New Driveway and the unassembled Tower


The photo to the right shows a portion of the new driveway along with several tower sections waiting to be assembled. The dirt to the right is from the excavation for the tower base.

In the next installment I’ll talk about the preparing the building permit and some of the other planning  that had to happen before actually starting the construction of the tower.

73,

Fred

My First Tower (Part 1)

Tower_Complete

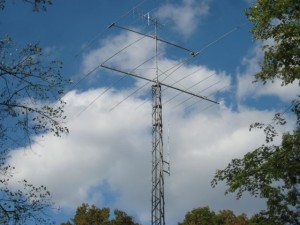
Completed Tower and Beams

I, like most hams have always longed for bigger and better antennas.  For most of my time as a ham I lived in sub-divisions that would only allow very discrete antennas.  None of these locations had trees large enough for hanging wire antennas, so my only antennas for many years were short verticals.  These verticals seemed to work pretty well, but didn’t provide opportunities for much DX because they were short and had only a few short radials.

After I moved to the country in 1993, I dreamed of installing a tower with a beam but for nearly 15 years my job kept me from spending much time much with my radio equipment or antennas.  In 2008 I retired and found I had a lot more time to spend with my radios.  I installed a 135′ doublet up 50 feet between two of our large trees and suddenly I was working DX I had never heard on my verticals.  After chasing DX for a couple of years using the doublet I got the itch to install some sort of beam antenna.  In the next several posts I will walk you my experiences (good and bad) of installing my dream tower and beams.

A Good Day

Even though the sunspots are taking a rest I still was able to log a new one today: Tokelau Island ,ZK3T, aka DJ2EH (Dieter).  He had a very nice signal in to Indiana this afternoon.

73,

Fred

Link Telescope

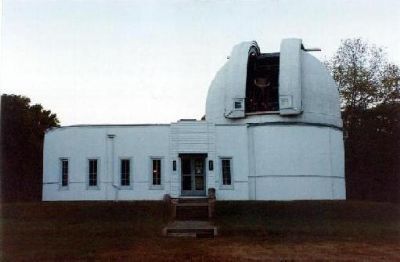
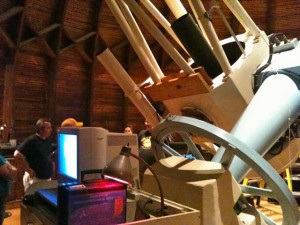
In addition to Ham Radio, I also am interested in astronomy.  If you look me up on QRZ.com you will see that I live on Observatory Road.  Our road has this name because there is a real observatory on the road.  The observatory was constructed in 1937 by Dr. Goethe Link an Indianapolis surgeon and avid amateur astronomer.  The telescope was constructed from a 36″ mirror blank built by Corning Glass as a test blank for the 200″ Mount Palomar telescope (http://www.astro.caltech.edu/palomar/).  

Goethe Link Telescope Martinsville, Indiana

Goethe Link Telescope
Martinsville, Indiana


The Link Observatory is owned by Indiana University but is cared for by the Indianapolis Astronomical Society.

This summer my wife and I had the unique opportunity to be trained as operators for this telescope.  The German Equitorial mount used on the Link telescope is remarkably similar to the mount used on the Palomar telescope.


Link Telescope German Equatorial Mount

Link Telescope German Equatorial Mount

Operating the scope is a lot of fun and a very interesting experience.  It can be very disorienting looking up through the dome as it is being rotated to a new location.  One of the most exciting observations we made during our training was to see Pluto.  

The telescope is no longer used for research because the local light pollution has limited its usefulness for research.  However, it is still a wonderful telescope for observational astronomy.  The telescope is now receiving new life as the Link Observatory Space Science Center.

Laura and I have had several opportunities to operate the telescope for public outreach programs and for groups of astronomy students from Indiana University.  It is really an amazing machine.

73,

Fred

Why do we hams accumulate so much stuff?

I have been planning for nearly a year to move my ham shack from its current location inside a small walk in closet to my home office.  The home office is closer the base of my tower, but more importantly it is about four times the size of my current location.  Unfortunately, my home office has become a large storage space since I retired.

I spent a few hours this morning sorting through some of the stuff I have been shoving into my office over the past 5 years.  It is hard to believe all the stuff we hams hold onto.  It seems like I am personally attached to every ham gadget, blown fuse, burnt resistor or piece of gear I ever purchased!  Fortunately, the clutter is overpowering me so it is time for some Feng Shui!  Some of this stuff is going to have to go to new homes.   Now if I can just follow through and leave more at the next hamfest than I bring home!

73,

Fred

Astronomy Picture of the Day

In addition to ham radio I am also interested in Astronomy.  During some our recent astronomy club meetings and outings I have noticed that there are a large number of astronomy enthusiasts that are also hams.  Maybe that means that the two hobbies attract the same sorts participants; those with an interest in technical things.  I think the same was true during the early days of the personal computer revolution.

Anyway, for you hams that are also interested in Astronomy, here is a great link to bookmark.  The NASA photo of the day is a good way to start the morning along with your cup of joe and a quick peek at the DX Spotting Network.

http://apod.nasa.gov/apod/astropix.html

Here is todays photo:

See Explanation.  Clicking on the picture will download  the highest resolution version available.

Alaskan Moondogs
Image Credit & Copyright: Sebastian Saarloos
Explanation: Moonlight illuminates a snowy scene in this night land and skyscape made on January 17 from Lower Miller Creek, Alaska, USA. Overexposed near the mountainous western horizon is the first quarter Moon itself, surrounded by an icy halo and flanked left and right by moondogs. Sometimes called mock moons, a more scientific name for the luminous apparations is paraselenae (plural). Analogous to a sundog or parhelion, a paraselene is produced by moonlight refracted through thin, hexagonal, plate-shaped ice crystals in high cirrus clouds. As determined by the crystal geometry, paraselenae are seen at an angle of 22 degrees or more from the Moon. Compared to the bright lunar disk, paraselenae are faint and easier to spot when the Moon is low.


HughesNet Upgrade

🙂 The HugheNet upgrade happened today.  It only took the installer about an hour to change out the old modem and dish.  So far the Gen4 is a vast improvement over our older HughesNet connection.  I haven’t measured the download speeds yet, but it does feel much zippier than before.

Fred, KC9QQ

Club Log

I don’t know how many of you use Club Log, http://www.clublog.org , but I would recommend it to those of you that like to chase DX.  I used to only use Club Log to check the logs of current and past DXpediitons for my call, but recently I have setup my own account and had DXLab upload my QSO data  to Club Log.  This provides a significant advantage when you are wanting to QSL any DXpeditions that are uploading to Club Log.  First of all, with a couple of clicks you can check the logs of all of the listed Dxpeditions for your call.

Once you have determined that you are in their log, many of them allow you to use OQRS (Online QSL Request Service) to request a QSL card.  If you chose to use OQRS, Club Log will automatically insert the QSO details uploaded from your log into the OQRS request form.  The only thing you have to do to request a card is to decide whether you want to pay a nominal fee via PayPal for a direct card or request that the card be sent via the Bureau.  Since I am still chasing a lot of new ones and a bit impatient I usually opt for direct QSL.  I have gotten very quick returns on most of the OQRS cards I have requested.

Club Log also allows other hams to verify that they are in your log before they send you a card. Club Log will not provide them the details of the contact in order to protect the integrity of the system, but it will let them know that you logged them on a specific band so they know they are  good in your log before going to the expense of sending a card.  Of course I also use LoTW to confirm many contacts.  I have greater than a 40% confirmation rate with LoTW.  However, to me it is still a thrill to receive a QSL card in the mail, even if it is not DX.

I also added a ClubLog tab on the website that displays my last 10 contacts.  The output also show my current DXCC count so you can see that I am far behind many of you in working DX.  Of course it is not so bad to be so far behind because it means I have lots of opportunities to work new DXCC entities :-).

73,

Fred, KC9QQ

Internet Upgrade

I don’t know how many of you live in rural areas, but those of us that do understand that some of the benefits of not having onerous Home Owner Association restrictions on our antennas are offset by the poor options for internet access.  While my ham friends in the city all have 2 to 50 mb internet speeds I have had to rely on a 1mb (on a good day) satellite connection.

My internet access is through HughesNet.  When I first installed HughesNet several years ago I experienced nearly a year of erratic access which often forced me to deal with their offshore technical support group.  It is a good thing that I could not crawl through the phone lines during a couple of those calls or the technician would have been running through the streets of Delhi with me on his heals!  Fortunately, things finally stabilized and it has run reasonably well for the past 3 years.

However, one of the biggest problems has been the limited amount of data that could be downloaded each day.  Watching one or two YouTube videos could use up your daily allotment which would cause your system to be FAPed (fair access policy) for 24 hours.  They say that is a reduction in speed but in reality it is more like having your access turned off for 24 hours (slower than dial up).  Even doing software upgrades had become nearly impossible because the size of upgrades has gotten bigger since most people are now connected by high speed broadband connections.  For example a recent upgrade to my Apple iMac was nearly one  gigabyte, twice as much as my FAP limit.  They only way I could upgrade the iMac was to download the upgrade between 2:00 am and 6:00 am when they don’t impose the FAP limit.  Even with the FAP free window,  at 1 mb/s it was still difficult to do large upgrades because they would not complete within the window.

HughesNet has now come out with their Gen4 system.  It has download speeds up to 15 mb/s (of course reality will be something less than that).  They have also changed their FAP to be a monthly total of (10-15 gb) rather than a daily limit.  This should make software downloads and other high bandwidth downloads (Netflix) possible each month.  At least I am keeping my fingers crossed.  I just hope I don’t have to live through another year of growing pains before the new system stabilizes :-(.

The installation is supposed to happen today (in the snow), so if I drop of the map for a week or two you’ll know it didn’t go well.  I’m hoping the ham radio axiom that antennas installed in bad weather work the best will also apply to my satellite internet antenna.

73,

Fred, KC9QQ

HughesNet has now come out