ARRL SSB Sweepstakes 2017

It has been a long time since I have spent much time operating a contest.  I decided to do a part time effort in this years ARRL SSB Sweepstakes.  My primary goal was to work all 83 ARRL Sections, which is called a Clean Sweep.  Unfortunately I fell one short of a Clean Sweep.  The section I missed was Puerto Rico.  That was not surprising since Puerto Rico is still struggling to recover from Hurricane Maria.  They have much more important things to deal with than ham radio.  Not hearing Puerto Rico made me realize how fortunate and blessed I am.

Normally I do search and pounce contesting, but this time I spent a couple of hours running stations on 15 meters in order to improve my confidence running stations.  I ran stations on 15 meters until the band started to fade late in the afternoon.  When 15 started to fade I decided that was a good for a dinner break–soup, fresh baked dinner rolls and hot homemade apple pie with ice cream!  My wife really takes good care of me!

After dinner I spent a little time on 40 meters doing search and pounce.  The pickings were pretty slim, so I decided to throw in the towel and relax the rest of the evening.

Here is a summary of my score.

Start Date : 2017-11-18

CallSign Used : KC9QQ
Operator(s) : KC9QQ

Operator Category : SINGLE-OP
Assisted Category : ASSISTED
Band : ALL
Power : HIGH
Mode : SSB
ARRL Section : IN
Club/Team : SOCIETY OF MIDWEST CONTESTERS
Software : N1MM Logger+ 1.0.6903.0

Band QSOs Pts Sec Pt/Q
3.5    64    128    22    2.0
7       81    162    24    2.0
14     75    150    17    2.0
21    113   226    19    2.0
Total 333   666    82    2.0
Score : 54,612

73,

Fred, KC9QQ

First Astrophoto Processed with PixInsight

I am relatively new to astrophotography.  I have found it very challenging,  turning the nearly invisible smudges my camera captures during my imaging sessions into full color photos.  A typical astronomical object will look like the following image before it has been processed.

M1 “Crab Nebula” RAW

Weak Signal

As you can see, it doesn’t look anything like the beautiful images one is used to seeing. This occurs because signal is very weak.  Therefore most of the pixel data are congregated into the lower part of the photos histogram.

The object in the image can be made visible by a process called “stretching”.  Stretching can be done in Photoshop, but astrophotographers typically use software designed to specifically process astronomical images.  There are many special purpose astrophotography programs available.  Some are free, others are nominally priced while the more sophisticated programs are  priced similar to Photoshop.

After trying some of the free and low priced programs with mixed results I decided to download a trial version of the very popular PixInsight program.  PixInsight is like the Swiss Army Knife of Astronomical processing software.  It has hundreds of special functions, each designed for a specific processing task.

Trying out PixInsight

After I downloaded the PixInsight trial  version,  I watched a number of video tutorials trying to learn the basics of the software.  While the online videos were very good at explaining the use of specific tools in the PixInsight toolbox, none of them did a good job of showing the basic steps needed to process an image. After watching several videos, I still did not have a clear understanding of how to use the program.  However, I should point out that now that I have learned the basics of PixInsight, the videos have been very helpful in improving my skills.

An Excellent Book on PixInsight

Warren Keller’s Book on PixInsight

Just as I was about to give up on PixInsight, Warren Keller (no relation) brought out an outstanding book on PixInsight.  Warren’s book turned out to be just what I needed to learn the basics of PixInsight.    The first six chapters of his book walk the reader through the essential steps needed to process an astronomical image.  After the completing those steps I was able to produce  presentable images.  The rest of the book walks the reader through many of the advanced features of the program.  These advanced topics can be used to make your images really pop (assuming you have enough good data).

I won’t attempt to explain each of the steps that I used to process the “data” I collected on M1.  However, I only used the techniques taught in the first 6 chapters of the book.  I am still experimenting with some of the more advanced features found later in the book.

Astrophotographers refer to the group of images (sub-exposures) they collect on a specific astronomical object as data rather than photos.  I think the reason they use this terminology is that until all of the sub-exposures are combined and processed they really don’t resemble a  normal photograph.

My Processed M1 Image

For M1, I collected twenty 3 minute sub-exposures;   one hour of total exposure time. Most of the premier astrophotographers will collect 6 to 30 hours of data on a given target.  Therefore, I didn’t expect my image to be as awe inspiring as the images of these highly skilled amateurs.

You can check out the work of some of the worlds best astrophotographers on NASA’s Astronomical Photo of the Day site.

M1 Crab Nebula

Here is my finished photo. It is a significant improvement over photos I have processed by simpler means.  I highly recommend PixInsight software along with Warren Keller’s excellent book “Inside PixInsight”.  His book gave me the set of training wheels I needed to get started with this incredible program.

Fred


Ham Radio Activity

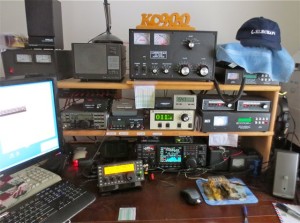
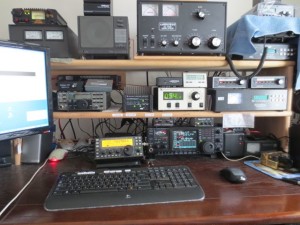
KC9QQ Station

KC9QQ Station

If you drop by my site once in a while, I’m sure you have realized that my ham activity has been down the past several months.

Much of my time the past 9 months has been consumed by the construction of our observatory.  I have still been getting on the air to work an occasional DX station.  Last week I even managed to spend a few hours participating in the SSB National QSO Party to support my contest club, The Society of Midwest Contesters.  It was nice to be back on the air.  I have several hobbies, but I always gravitate back to Ham Radio.

I am starting to look forward to contest season.  I like to operate in the CQ WW (CW and SSB) I also enjoy operating in the ARRL Sweepstakes.  I suspect a Clean Sweep will not be in the cards this year since the 10 and 15 meter bands are have not been open much with the current drop in the Sunspot Cycle.  Hopefully, this will improve before the CQ WW contests.

I have also corrected a few problems with my station.  I had to replace one of my Ameritron Remote Antenna switches because a couple of the relays were not making good contact.  With the new switch installed everything is working well again.

I have also spent a few hours trying to catch up on responding to Bureau QSL cards I have received. I tend to put those off for rainy days in the shack!   I use GlobalQSL to send

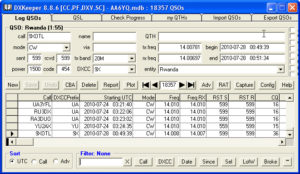
DX Lab Logging Program

DX Lab Logging Program

Bureau cards.  This makes the process pretty painless, once I get everything loaded into DX Lab.

DX Lab is a fantastic logging program.  It has helped me get a handle on my DXCC progress.  It also really simplifies the QSLing process.  It can handle paper cards, LoTW, eQSL and QSL services such as GlobalQSL.


I Hope to see everyone on during SS or CQWW this fall.

73,

Fred, KC9QQ


Construction of Our New Roll-off-Roof Observatory

The next step in the construction of our Roll-off-Roof was the construction of the building.  We chose a design from Back Yard Observatories, BYO.

Scott Horstman contacted me a few days prior to the planned start date, to let me know that a local building supply house would be making a delivery the following day.  Here is a photo of the large pile of material that was delivered.

Building Materials Arrive

Building Materials Arrive


With the help of the delivery crew, I was able to identify and count all of the different items before I signed off on the delivery.  This was harder than I thought it would be because there were many types of materials with names that were new to me.  I know things like 2×4, 2×8 etc, but names like OSB and five quarter were new to me.

When Scott and his crew arrived the next day, they inventoried all of the materials before starting construction.   Next, they measured the size and squareness of the concrete pad. Apparently, he has run into pads which were several inches from square.  Scott quipped that it is still possible to build a square building on a trapezoidal foundation, but not ideal!  Our foundation was square to within 1/8″ thanks to our excellent concrete contractor.

Checking the Pad

Sorting Material and Checking the Pad

Once the pad had been checked, they began framing the walls.  They were able to use the observatory’s concrete floor to assemble the walls.  Since I already had power to the observatory pad, they were able to install a temporary outlet to run their saws and compressors.  It was amazing for me was to not see Scott or any of his crew refer to a single drawing during the construction.  He and his expert crew build so many of these observatories (although they are all different sizes) they automatically know the dimensions for every part!

Assembling One of the Walls

Assembling One of the Walls

Once each wall was completed it was leveled and anchored in place.

IMG_1228

First Wall Up, 3 to Go


IMG_1233

Here you can see that three walls have been completed.  In the above photo you can see that the south wall is shorter.  The gap in the top of the wall will be filled once the hinged drop- down south wall has been installed.  Also, you can see the beefed up header on the right (West) wall.  The additional header is needed to support the weight of the roll-off-roof.  Below is photo looking from the South.

IMG_1232

South Wall Showing Cutout for Drop Down Section


Once all four walls were in place, the framing for the roll-off-roof support structure was added. In addition, they are starting to frame the deck we had them add under the roll-off-roof supports.  The deck turned out to be a very nice addition to the observatory.  It makes a very nice place to sit and relax when we are waiting for it to get dark prior to a summer observing session.

Construction of Deck and Roll-off_Roof Supports

Construction of Deck and Roll-off_Roof Supports

With the framing for the deck completed it was time to start adding the decking.
We chose treated five-quarter decking, but in retrospect I would have probably gone with the more costly composite material to reduce future maintenance.

Deck Framing Complete

Deck Framing Complete

All of the decking was nailed down it was cut to length in a single cut.  That is a pretty neat trick to make sure that all of the boards are exactly flush at the visible end of the deck.  The other thing I realized is that doing it this way saves considerable time that would be required to measure and individually cut each board.   Being the weekend hacker that I am, I don’t think I would have thought to do it this way.

Deck Planking

Deck Planking

Once the walls and roll-off-roof support structure were completed, fabrication of the two rolling beams that support the roof trusses were assembled.  There are four heavy duty steel “V” rollers used on each beam.  The beam is also strengthened with a treated 2 x 8.  The 2 x 8 also covers the gap between the top of the wall and the bottom of the roof.

Construction of Roof Rollers

Construction of Roof Rollers

The following photo shows the roof support beams sitting on the angle iron rail which supports the roof and guides the rollers.

Roof Roller Installed on Rail

Roof Support and Rollers Installed on Wall and Roof Rail

Finally the roof was completed and ready to be rolled back if the rain would stop!  We were lucky we were only getting sprinkles instead of a “hoosier” downpour, which would have stopped the work.  Once the roof was on, the roof and walls were covered with felt paper before the metal roofing and cedar siding were installed.

Roof Completed

Roof Completed

In this photo the cedar siding has been installed and the metal roof is being completed.

Metal Roofing and Cedar Siding Being Installed

Metal Roofing and Cedar Siding Being Installed

The final photo shows what the observatory looks like with the roof rolled back!  Our friends and family are always amazed when they seen the roof rolled back for the first time.

Observatory with Roof Rolled Back

Observatory with Roof Rolled Back

In the next installment, I’ll move inside the observatory to show some of the interior details.

Observatory Build (Electrical and Data Connection)

After the concrete pad was completed the next step was to trench electrical, data and security cables to the observatory pad.   Since the observatory is over 200 feet from the house trenching for the cables was a significant job.  This was a bigger job than I wanted to tackle with a walk behind trencher.  Therefore I hired an excellent electrical contractor to run the power and data connections to the observatory.

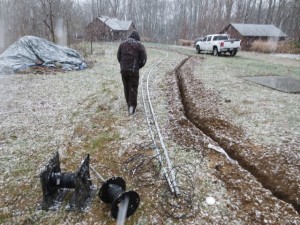
The finished Trench for Power and Data

The finished Trench


The day started out pretty nice.  The weather forecast was predicting dropping temperatures with the possibility of light snow flurries.  Our contractor got an early start, so we did not expect the weather to be a problem.

He used a Bobcat with a trenching attachment to dig the trench.  The entire trench was completed in less than an hour.  As you can see by his attire, the temperatures were not real cold when he completed the trench.  Unfortunately, that was going to change!


Preparing the Conduit Just as the Snow Starts to Fall

Preparing the Conduit and Pulling Wires


By the time he started assembling the conduit, the we were starting to get light snow flurries.

The next step was pulling the cables.  The snow flurries were getting progressively heavier as they were pulling the wires.

Before they were done the weather turned into near blizzard conditions. Note they are now wearing  heavy coats and gloves. I stepped inside the house after this photo, to warm up.  Of course, they kept on working!

More Snow (What a Mess!)

Where did this Blizzard come from?

By far the hardest part was pulling the three heavy gage wires through the power conduit.   This is where the skill of the electrician versus the weekend warrior (home DIY) is apparent.  Even with the atrocious weather,  they were able to get the wire pulled and the conduit into the trench in a little less than two hours.  The biggest problem they had was maintaining  their footing in the slippery slope near the house.

Once all the wires and conduits was in the ground everyone was chilled to the bone.  So much for trusting the weather forecast.

Some final comments on this part of the project.

  1. Install large power and data conduits.
    The electrician that everything be installed in conduits; even though it was not required by our local code.  He would have had to bury the wires deeper had he not used conduit.  Also, he inserted a pull string in each conduit, in case we would ever need to add an additional circuit or data cable someday.  This is very cheap insurance.
  2. Install larger circuits than you think you need.
    I asked for two 15A circuits.  I felt this was enough capacity to satisfy my requirements.  However, he suggested two 30A circuits and an additional wire to give me 230V circuit if needed.  The difference in cost was only about $300.  In retrospect, I realize that two 15A circuits would have been marginal since one them was already dedicated to the Roll-off-Roof system.  That would have left a single 15A circuit to power everything else in the observatory.  With the 60A capacity I have, I don’t have to worry about future growth.
  3. Utilize an experienced, licensed electrician.
    Their experience and skills will save you money and problems in the long run.  My electrician saved me a lot of frustration and kept me from making several costly mistakes.  I also ended up with a much better installation than I could have done myself.

Fred


Building an Observatory (First Steps)

Indiana weather does not offer an abundance of clear nights for observing or astrophotography.  However, last winter we had a lot of clear nights, but the time to setup and teardown my astrophotography setup kept my wife and I from taking advantage of most of them. We found it really hard to get motivated to setup and teardown our gear with snow on the ground and frigid temperatures.

As our frustration grew, we decided we should build a “simple” observatory.  Our initial plan was to construct a small concrete pad with a permanent pier; which could be covered with a small garden shed which could be rolled over the pier to protect the telescope and mount.  Of course, as our planning progressed, the scale of our  “simple” observatory began to expand! After nearly 9 months of planning we decided to build a medium sized roll-off-roof observatory.

We settled on a 15′ x 15′ Roll-off-Roof design with two piers and an area to setup a third telescope inside the observatory.  One of the piers will be dedicated to astrophotography and the other will be used for visual astronomy.  The advantage of an observatory is that anytime there are clear night skies it is easy to open the observatory and begin observing; eliminating most of the long setup time.  The elimination of 3 hours of setup and teardown will substantially increase our motivation to take advantage of the clear and cold winter skies.

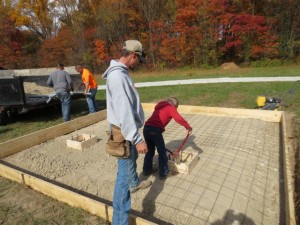
Framing of Observatory Pad

Framing of Observatory Pad


Construction started in early November. The pad forms were constructed the day before the concrete pour.  The pad included two cutouts where the piers will be installed.


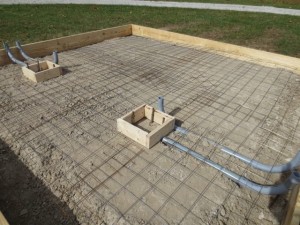
Completed Forms Showing Pier Locations and Power and Data Conduits

Completed Forms Showing Pier Locations and Power and Data Conduits


Conduit was added to handle the electrical and data cables that will be needed at each pier.


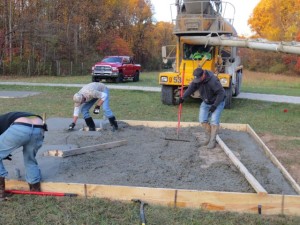
More Concrete and Lots of Hard Work

The Concrete Pour Ballet


On the following day It was time to pour the concrete.  After watching this expert crew work I was relieved that I hadn’t tried to do this myself.  Watching their choreographed ballet I was impressed with their skill and organization. Things were happening so fast that there was no time to stop and decide who was to do each job or discuss how something was to be done.


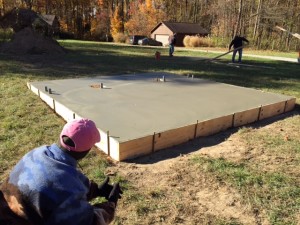
Completed Observatory Foundation

Completed Observatory Foundation


Here is a photo of my wife admiring the completed pad.

Check back in soon to see the observatory construction begin.

Fred

CQWW SSB 2015

hmi200

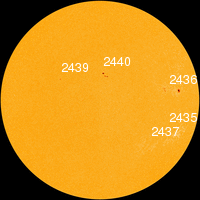
Sunspots During Contest

It has been too long since my last post.  Many other activities have diverted my attention away from ham radio this year.  I have been able to work some DX, but have not had a much time for contesting or for that matter, time to post on this site.

This past weekend I finally was able to spend some time operating in the CQ Worldwide SSB contest.  It was fun to be able to spend a few hours working stations from around the world.  The bands were not as good as a couple of years ago, but 10m and 15m were both open some during the contest.  The sunspot index was in the 120s during the contest.  If I recall correctly, the Sunspot index was nearly 200 a couple of years ago.  I’m hoping the current sunspot cycle does not fade out too soon, because the last down cycle was a real downer!

My equipment worked flawlessly during the contest.  The time I spent tweaking the setup this summer must have paid off.

Here is a summary of my score:

Band QSOs Points Zones Countries
3.5 5 12 4 4
7 124 346 17 57
14 160 438 30 77
21 210 578 27 77
28 222 620 23 60
Totals 721 1994 101 275

 Score : 749,744

I operated about 17 hours doing Search and Pounce.

Fred

2014 SSB Sweepstakes

The ARRL SSB Sweepstakes last was last weekend.  This is the first contest where I called CQ rather than Search and Pounce operation.   I waited until I had worked all but one Section before I started calling CQ since my primary objective had been to get a clean sweep.
I was very nervous the first time I called CQ.   I was afraid I would not be able to copy the other stations well enough to hold the frequency or that I would look like a complete newcomer (I guess in a sense I was).  This turned out to not be as big a problem as I had expected.
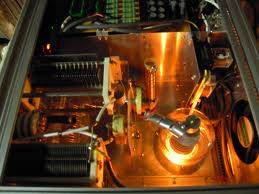
3500zWarmAfter running stations for a  while I started to get into the routine and felt fairly comfortable running stations.  However, my voice got a real workout since I was not using any recorded sound clips.   I was surprised when I saw bright orange glow from the AL-80B after I had been running stations a for a while.  I guess when I S&P I never have a high enough duty cycle to get it’s 3-500Z warmed up!
I had another surprise when I generated a 1-1/2 hour  long pile up on 40 meters working stations that were actually looking for Indiana!  That was exhausting. I gained a more vivid appreciation for the skills of the DXpedition operators.  I’m sure some of the stations in the pileup were mumbling under their breath as I was trying to pick calls out of the mess.  Thank goodness it didn’t last much longer because I needed a biological break!  I was excited when I finally worked NT (Northern Territories) late Sunday afternoon and again near the end of the contest.

I was pleased with the contest, because my score was an improvement over last year, plus I managed to work a clean sweep.  I used N1MM+ in the contest.  It worked flawlessly during the contest, but I had a problem generating my Cabrillo log after the contest.  I ended up importing an ADIF file into the Legacy N1MM and to create the Cabrillo log.  Hopefully, an update will correct the issue before the next contest.  I am not sure why N1MM+ listed two lines for 28 mHz?
There is a summary my modest effort below.
Fred, KC9QQ
                   SSSSB Summary Sheet
Operator Category : SINGLE-OP
Assisted Category : ASSISTED
             Band : ALL
            Power : HIGH
             Mode : SSB
 Default Exchange : U 71 IN
       Gridsquare : EM69TN
          Band     QSOs     Pts  Sec
         3.5           106        212   30
           7             244       488   23
          14           138        276    6
          21            136        272    1
          28            140        280   23
       Total            764    1528    83
            Score : 126,824

First Attempt at Astrophotography

Astrophotography Setup

Astrophotography Setup

Intermixed with my ham radio activities this summer I have started to dabble in Astrophotography.    A camera is similar to a very sensitive receiver.  It is able to give very nice views of faint stellar objects that are often barely visible through the telescope’s eyepiece.

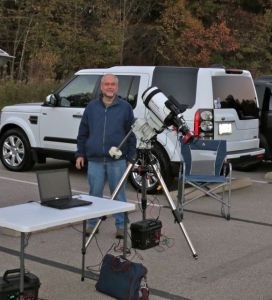
This photo was taken at Burkhart Creek County Park, in Morgan County Indiana.  This park is a nice dark site for central Indiana.  It is located about 35 mile Southwest of Indianapolis.

On this particular night the temperature dropped rapidly and dew began to cover everything soon after sunset.  The black strap on the front of the telescope is a dew heater which keeps the dew from condensing on the telescopes optics.

M27_BurkhartCreek

Dumbbell Nebula Messier 27

As a newcomer to astrophotography, I have learned something new during each outing.  On this particular outing I discovered that my setup was not well balanced; thus overloading the Declination drive motor.  I made some temporary adjustments and was at least able to take the following image of the Dumbbell Nebula (Messier 27).


Once I got home, I corrected the balance issue.  Now if we can just get some clear skies, I will try some more astrophotography.

73,

Fred, KC9QQ

Some Springtime Observing

Saturn

Saturn

On Tuesday night the skies were clear so my wife and I got with some others from the Indiana Astronomical Society to do some observing.  I took our Meade LX80 mount and 6 inch Astro Tech refractor to give it a run.  During the winter I added a StarGPS to the LX80 to make the setup a bit easier.  I highly recommend the StarGPS system.  It eliminates many of the potential errors that can lead to poor scope alignment.  If the scope is carefully leveled and set to its home position, the GPS will enable you to get a near perfect alignment every time.

After I assembled  and leveled the LX80 I installed the Astro Tech scope and turned on the power.  In about 2 minutes the StarGPS found our location.  It loaded the correct time and location into the handset and then put the hand controller into the “Easy” align mode.  I did a two star alignment and was pleased to see a “Alignment Successful” message on the hand controller.

The first thing I did was slew to Jupiter to catch it before it dropped below the trees.  I was rewarded with a nice view of Jupiter and four moons. Jupiter’s bands were visible but the Great Red Spot was not visible.

My wife and I spent the rest of the night viewing a number of deep space objects.  One of the nicest DSOs we saw was when my wife got M81 and M82 in the eyepiece at the same time.  We also had a nice view the Sombrero Galaxy (M104).  Later in the evening I tried out Meade’s “What’s Up Tonight” feature to take  a guided tour of the nights best objects.  The hand-controller selected a few objects that were new to me;  so it was time well spent.

We finished up the evening by getting our first view of Saturn this year.  I always enjoy looking at Saturn because it has such a striking appearance.

Fred,  KC9QQ